

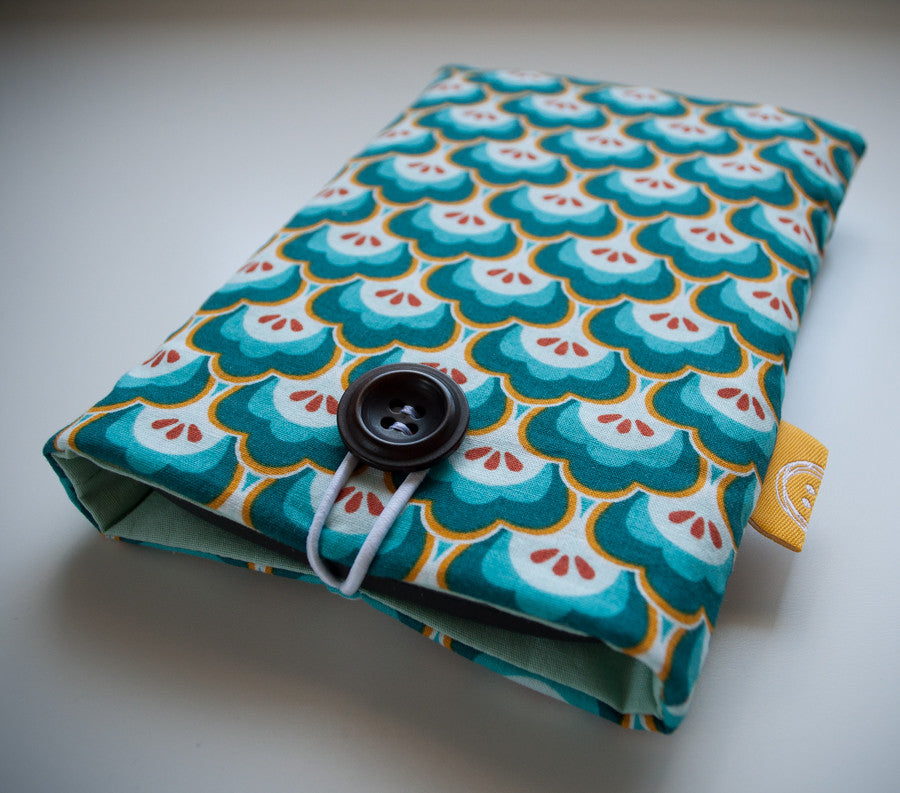


I have been making quite a few of these super simple flat pouches in different sizes, for slim rectangular objects like cameras, smart phones, portable GPSs etc. In the process, I have developed a very simple formula to easily determine the right pouch size for a nice snug fit.


These only take about 30 minutes and make great gifts.
There is also an ideal project for beginners as they are so easy to make. If you do have to make a choice on which size to try, a larger pouch (e.g. iPad) is a little bit easier than the smaller ones (e.g. smart phone).
To make the pouch you will need:

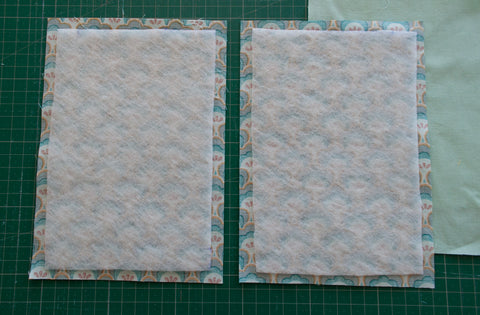
- 4 rectangles of fabric: 2 for the inside, 2 for the outside.
- 2 rectangles of fleece fusible (iron-on) interfacing. I use Vilene H630 for small pouches, and Vilene H640 (which is a bit thicker) for the larger sizes, like an iPad case.
- optional: 10cm elastic + 1 button
So here is how you determine the size of your fabric pieces:
1. Measure the circumference of your product in both directions (just loosely, no need to pull tape measure tight)
2. Add 5 cm (or 2") to each measurement.
3. Divide these two numbers by 2, the resulting numbers are the dimensions of your fabric rectangles.
For the interfacing make the rectangles 2cm (3/4") shorter in each direction to avoid bulk in the seams.
These dimensions take into account a seam allowance of 1cm (3/8").

Here is an example:
- The circumference of this GPS device measure 36cm wide and 24cm tall.
- If I add 5cm I get 41cm and 29cm respectively.
- Dividing both numbers by 2, I get a rectangle of 20.5 and 14.5cm.
So I've cut 4 pieces of fabric of 20.5cm by 14.5cm and 2 pieces of interfacing of 18.5 by 12.5.
Here is how you put it all together:
Iron the fleece interfacing to the wrong side of the 2 pieces of fabric that will make up the outside of the pouch.
Use an ironing cloth to iron this on, and use steam for better adhesion.

If you want to include a piece of elastic as a closure, sew it on the right side on the top of one of the external pieces. Mark the middle of the top edge and align the raw edges of the elastic to the raw edge of the rectangle.
The length is determined by the elasticity of the elastic but here I have used a 10cm piece. Stitch over it a few times to secure it in place, but make sure you stay within the 1cm seam allowance so the stitching will be hidden once the pouch is finished.

If you would like to add a little decorative label, stitch it on now as well so it doesn't move when you stitch the two external pieces together later. Again be sure to remain within the 1cm seam allowance, I usually stitch at the width of the sewing foot which is about 7mm.
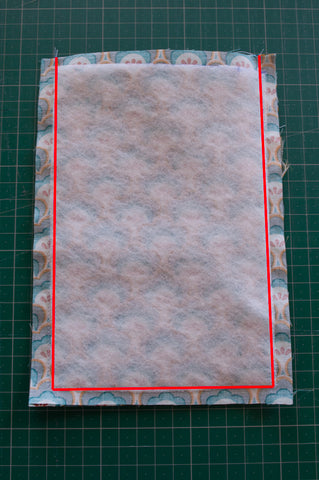
Put the external pieces RST (right side together - make sure to put them in the right direction if you have a directional print) and stitch along 3 sides, leaving the top side open. Stitch at a 1cm seam allowance. (See red lines)


Clip the two bottom corners, making sure not to cut into the stitching, and turn right side out, pushing the corners out.
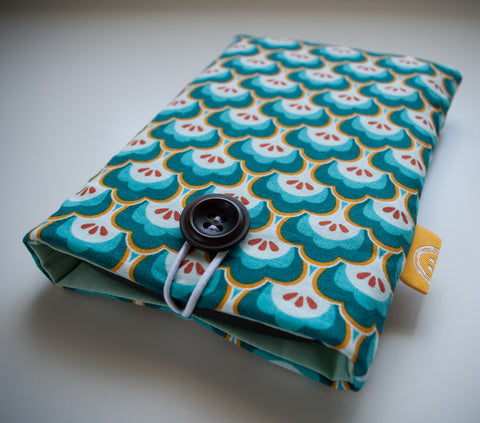
Your external pouch should now look like this:

Now assemble the internal pouch: Put the pieces RST and stitch along the 3 sides, however, leave a gap at the bottom of about 6cm(see red lines). Clip the two bottom corners, making sure not to cut into the stitching.
Leave wrong side facing out.

Place the external pouch inside the internal pouch. If done correctly, the right sides of the internal pouch should face the right sides of the external pouch. Align the raw edges, and the seams and open up the seam allowance, pin in place. Stitch at 1cm along the top edge, therefore connecting the 2 pouches. This stitching can be done from the outside, or the inside of the pouch, whatever works best for you.


Pull the external pouch through the opening in the internal pouch, then push out the corners of the internal pouch.


Now it's time to close the opening. Make sure the raw edges of the opening are tucked in, it helps to give it a quick press. Then top stitch at a narrow seam allowance to close the opening.

Push the internal pouch inside the external pouch. If you like, you can top stitch along the top edge at a few mm, but I often don't bother with the smaller pouches.
Sew on the button and done!

Here is one I made for our compact camera, I didn't add the button here.


